Wednesday, July 31, 2013

Missing Tooth Punch Art Card

My inspiration for today's card came from my recent experience with chipping a tooth.  Unfortunately, my daughter was a little excited about returning to dance class after our vacation.  While I was helping her get dressed, she jumped up and hit my chin.  My bottom tooth chipped and I had to visit the dentist first thing this morning.  Looks like I may need a root canal and a cap to make my tooth more comfortable since I'm still in so much pain :(  So I decided to use my experience to make a card for a child who has lost a tooth. 
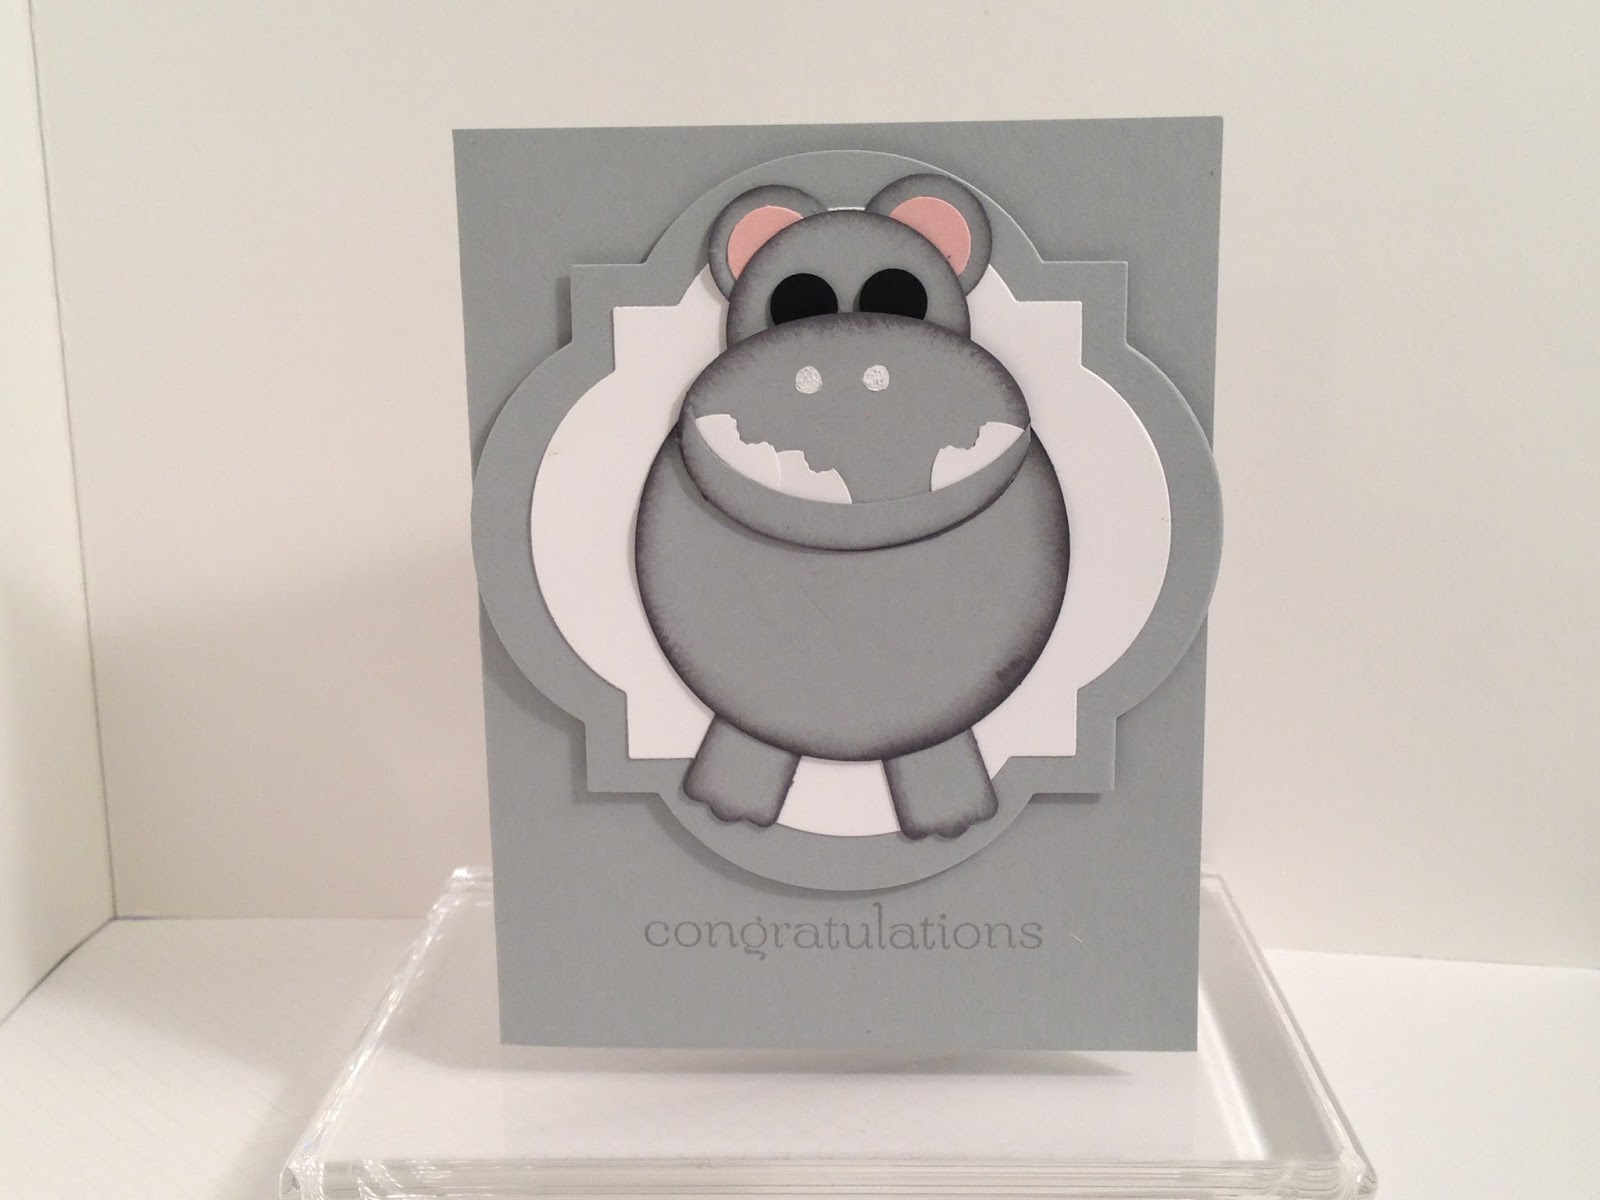
Hippo who lost a tooth
Close up of hippo

Tooth created from Small Oval and Bitty Butterfly punches
To create hippo I used the following punches and sponged the edges 
of the punched pieces before assembling:
2 ½ ” Circle for body
1 3/8″ Circle for head
Extra-Large Oval for mouth - punch 2; punched out the lower lip/mouth of hippo by putting extra-large oval punched piece into the extra-large oval punch a second time and punching out a huge chunk of the oval
Small Oval for teeth - punch 3; punched out teeth by putting small oval punched piece into small oval punch a second time and punching out 1/2 of the oval
Bitty Butterfly for teeth marks at top of teeth - fed small oval punched pieces into bitty butterfly punch where the bottom wings come together
¾” Circle for ears - punch 2
½” Circle for inside of ears - punch 2

Itty Bitty Circle from Itty Bitty Shapes Punch Pack for eyes- punch 2
Modern Label for legs/feet - punch 2

I think this would make a great "Congratulations on using your first tooth!" card.  I will be making up a few of these to use for my friends' kids soon.  Enjoy!

Ingredients:
2 ½ ”  Circle Punch #120906
1 3/8" Circle Punch #119860
Extra-Large Punch  # 119859
Small Oval Punch #120908
Bitty Butterfly Punch #129406
¾” Circle Punch #119873
½” Circle Punch #119869
Itty Bitty Shapes Punch Pack #118309
Model Label Punch #119849
Window Frames Collection framelits (used as a layer behind hippo) #129021
Smoky Slate, Whisper White and Pink Pirouette card stock
Basic Gray ink for sponging on hippo pieces
Smoky Slate ink for "congratulations" greeting on card
uni-ball Signo Gel Pen for adding hippo's nostrils

Wednesday, July 24, 2013

Backyard Basics/Hello Friend Card

Hello Sweet Friends!  All of us bakers have returned from Stampin' Up!'s Convention and I'm already going through withdrawls.  To help deal with my withdrawls, I've gone to the beach with my family for a week.  It's not the same type of vacation as having lots of fun with my Stampin' Up! demonstrator friends but there's nothing like being at the beach to help you unwind after such an awesome trip.  Plus, get your mind going some more about all the new and exciting products coming out with the Holiday Catalog on August 1st!

Until then, here's another card I created to swap with other demonstrators at convention.  I created it by embossing a 4" x 5 1/4" piece of Whisper White card stock using the Honeycomb Embossing Folder.  Added it to an Early Expresso card base.  I stamped the bee image from the Backyard Basics stamp set in Early Expresso onto a scrap piece of Whisper White card stock and cut it out using the matching framelits.  I love these things!  I wanted the bee to look like it was going to it's beehive so I punched out 3 - Daffodil Delight pieces of card stock using the Hexagon Punch.  To add a bit of dimension, I sponged around the edges of each punched piece of Daffodil Delight card stock and glued them to the Honeycomb Embossed Layer.  I also stamped a greeting from the Six-Sided Sampler stamp set and punched it out using the Hexagon Punch as well.  I added this  punched layer to the Whisper White background layer with a dimensional. I also added the bee with a dimensional.
Ingredients:
Backyard Basics stamp set #129255 WM or #129258 CM
Backyard Basics Framelits #129380
Six-Sided Sampler stamp set #130953 WM or #130956 CM
Hexagon Punch #130919
Honeycomb Embossing Folder #129378
Early Espresso ink
Daffodil Delight, Early Espresso and Whisper White card stock
Stampin' Dimensionals

Wednesday, July 17, 2013

Going To Convention with Label Love & Background Builders Cards

Watch out Salt Lake City.  Here we come!  Most of the bakers here at Pink Paper Bakery are attending Stampin' Up!'s Convention this week.  It's their 25th Anniversary!  Today we are leaving on a jet plane to join thousands and thousands of other creative demonstrators in Salt Lake City.  At Convention, Leadership, Regionals and other Stampin' Up! events, demonstrators have the opportunity to swap cards.  We create multiples of our card(s) and "swap" them with other demonstrators.  I have created 5 different card designs and have been sharing them with you the past 2 weeks and I will be sharing the last 2 swap cards over the next few weeks.  Here is a card I will be swapping at convention this week:
I LOVE how this card turned out!
This card is so simple to create but really creates quite the "WOW" factor with the punch of colors.  Start by embossing your Calypso Coral card base with either the Chevron Embossing Folder or the Argyle Embossing Folder.  Create your own background by using one of the Background Builders stamps.  I chose  the large wording stamp from this set , stamped it in Crumb Cake on a 3 1/4" x 3 7/8" piece of Very Vanilla card stock and stamped it over and over again until it filled up the white space on the card stock.  FYI: You could always use a Stamp-A-Ma-Jig if you are looking to have your background appear even and completely lined up.  I just chose to use my stamp as my guide to make my word images line up.  Add it to a 3 3/8" x 4" Crumb Cake layer and adhere right onto the Calypso Coral card base.  Next, stamp one of the Label Love messages in Bermuda Bay onto a scrap piece of Very Vanilla card stock.  Punch it out using the Artisan Label Punch and add it to a Crumb Cake punch layer by using dimensionals.  Use the Decorative Label Punch to create the Crumb Cake punch layer. Add a piece of Calypso Coral Chevron Ribbon to the back of the Crumb Cake Decorative Label Punch using a bit of snail and trim the ends of the ribbon to give it a banner/ribbon look.  Add the whole Label Love punch and Calypso Coral Ribbon layer to the card.  You're finished!  Simple, easy and "WOW"!
Used the Argyle Embossing Folder and a different Label Love stamp for this card.  Plus, I sponged the edges of the Label Love message with Calypso Coral to add a little more "WOW."
Ingredients:
Label Love stamp set #130619 WM or #130622 CM
Background Builders stamp set #129147 WM or #129150 CM
Decorative Label Punch #120907
Artisan Label Punch #130920
Calypso Coral 3/4" Chevron Ribbon (my new fav!) #130018
Chevron Embossing Folder or Argyle Embossing Folder
Calypso Coral & Crumb Cake ink and card stock

Monday, July 15, 2013

July Club Cards

Club cards included lots of new stamp sets and goodies from the 2013-2014 Catalog for this month.  Check them out here:
Cycle Celebration, Four You and Chalk Talk stamp sets
Close up of Chalk Talk banner
Label Love & Background Builders stamp sets
Backyard Basics & Six-Sided Sampler stamp sets

June Stamp Club Cards

Here are the 3 cards we did for Stamp Club this month:
Creative Elements stamp set
Mosaic Madness stamp set & Mosaic Embossing Folder
Close up of Banner Greetings using Chalkboard Technique
Open Sea stamp set - Father's Day card
Open Sea stamp set - birthday card

Wednesday, July 10, 2013

Cycle Celebration Card

I love the large candle image from the Cycle Celebration stamp set but wasn't quite sure what to do with it.  Once I got my hands on the new Birthday Basics DSP and saw the sheet of random candles, I knew exactly what I wanted to do.  I decided to stamp the single large candle image onto a 3 1/4" x 4" piece of Whisper White card stock over and over again in different colors to create a background.  At first, I tried stamping it on a piece of Very Vanilla card stock with the color combination I chose to use (Strawberry Slush, Basic Gray, Coastal Cabana and Crisp Cantaloupe).  It didn't look so great though so I switched over to the Whisper White card stock and the colors popped!  Then I added my candle background layer to a 4" x 5 1/4" piece of Crisp Cantaloupe card stock and put both layers onto a Strawberry Slush card base.  I decided to use the greeting that came with the Cycle Celebration stamp set and stamped it in Basic Gray and Strawberry Slush but couldn't decide which color I liked the best.  On recommendation by a great friend and fellow blogger - Deena, I punched out the Strawberry Slush greeting and added it on top of the Basic Gray greeting.  Both of these layers were backed with a piece of Basic Gray card stock punched out with the Decorative Label punch and then added to the card with dimensionals.  I love how bright and vibrant these colors are and how well these colors go together!
*Tip for creating the candle background with a single large candle image: If you don't have a very even hand when stamping, I suggest using the Stamp-A-Jig tool to make your candles look even and lined up perfectly.

Ingredients:
Cycle Celebration stamp set #130270 WM or #130273 CM
Decorative Label Punch #120907
Large Oval Punch #119855
Strawberry Slush, Basic Gray, Coastal Cabana and Crisp Cantaloupe ink pads or markers
Crisp Cantaloupe, Strawberry Slush, Basic Gray and Whisper White card stock
Stampin' Dimensionals

Wednesday, July 3, 2013

Chalk Talk & Cycle Celebration Card

Stampin' Up!'s Convention is only 2 weeks away and I am getting so excited about going with a great group of girls!  Jen, Deena, Jenny and I from Pink Paper Bakery are all going together to convention and always have fun when we're together...sometimes too much fun :)  As I prepare for convention, I have been creating a few different card layouts and designs that I can duplicate for card swapping.  It's a chance for demonstrators to swap their cards for another demonstrator's card.  I always end up with many different ideas to share with my crafting friends.  So here is the first card I have created for swapping:
My new fav stamp set: Cycle Celebration!
I love the look of tone on tone card layers so I started with a 4" x 5 1/4" piece of Whisper White card stock on top of a Whisper White card base.  Then I added a 4" x 1 1/4" piece of Daffodil Delight DSP from the Quatrefancy Specialty DSP, added the bicycle image in Bermuda Bay from the Cycle Celebration stamp set, added the "hello" greeting from the Four You stamp set by alternating Coastal Cabana and Bermuda Bay markers on the letters and added  a greeting in Coastal Cabana and Bermuda Bay from the Chalk Talk stamp set and cut it out with the Chalk Talk framelits.  But my card was lacking something.  Luckily, I was stamping with Deena so she was able to suggest the Bermuda Bay banner on top of the Daffodil Delight DSP and the Daffodil Delight flower punched out with the Itty Bitty Shapes Punch Pack.  It made my original card layout pop and I just love it!
Close up of banner and DSP layers
Ingredients:
Chalk Talk stamp set #130631 WM or #130634 CM
Cycle Celebration stamp set #130270 WM or #130273 CM
Four You stamp set #130535 WM or #130538 CM
Chalk Talk Framelits #129983
Quatrefancy Specialty DSP #130141
Itty Bitty Shapes Punch Pack #118309
Coastal Cabana and Bermuda Bay ink and markers
Bermuda Bay, Daffodil Delight and Whisper White card stock
Rhinestone Jewels